Two things happened tonight as I was logging off work:
- I still felt a good level of mental energy and capacity
- I realized most tutorials for people learning web-dev are boring
So I thought to myself: wouldn’t it be nice if there was a resource that collected the fun-nest and most interesting tutorials out there? And since I am investing more and more on Twitter, I settled on making this a 🤖 Twitter bot: @_andfun.
The whole thing took me only a couple of hours. It’s amazing what we can do with technology today!
So let’s dive right in and see what it takes to make a simple bot, step by step 👇
1. I like Airtable
I decided to host my curated list of tweets on Airtable, because it’s fun and easy. The base is a very simple table with the URL to the tutorial, a hand-written text for the tweet, a helpful character counter and a field to set the date on which I wish the tweet to be published.

Since I plan to only tweet once a day I made a separate view, called Today (the one screenshotted is Grid view), filtered to list only the tweets with the “Post On” column equal to TODAY(). Which will actually be only one tweet. You’ll see how this comes handy later on.
2. I also like Glitch
While I’ve never used Glitch before, I found out there is a project that you can easily fork (or, remix, in Glitch slang) aptly named twitterbot. The project is written in JavaScript, which is very nice since Airtable provides a useful little npm package to work with its APIs.
3. But first: Twitter apps
Before going forward, I needed to create a new Twitter account for my bot, and a new Twitter app. twitterbot’s README file points to a well made resource for this (How to create a twitter app), so I won’t repeat the steps here. Just a couple of notes:
- I needed a new email. I submitted a modified version of my personal email, in the form: [myactualgmailaccount]+twitterbot@gmail.com. It’s awesome: it’s a different email address, but it gets automatically redirected to my main account (everything after the
+sign is effectively ignored). - I also had to provide and validate a real phone number. Just so you know if you try this.
4. Creating the Twitter profile
I wanted something fun and cute. I found the perfect robot face on Flaticon. it’s a great resource for illustrations and icons, some are free (with attribution), others come with a paid subscription. For the background I screenshotted a frame from this super cool gradient generator.
5. Putting it all together
With the Twitter profile ready, and the Twitter app approved (it took only a few seconds for Twitter to approve my app), it was time to get my hands dirty. Luckily, Airtable provides a well made API with very good docs.
The Glitch template also provides a server.js file skeleton, and it wasn’t too hard to put the two together. Here is my full code:
1// File: server.js23/* Setting things up. */45const express = require("express"),6 app = express(),7 Twit = require("twit"),8 config = {9 /* Be sure to update the .env file with your API keys. See how to get them: https://botwiki.org/tutorials/how-to-create-a-twitter-app */1011 twitter: {12 consumer_key: process.env.TWITTER_CONSUMER_KEY,13 consumer_secret: process.env.TWITTER_CONSUMER_SECRET,14 access_token: process.env.TWITTER_ACCESS_TOKEN,15 access_token_secret: process.env.TWITTER_ACCESS_TOKEN_SECRET,16 },17 },18 T = new Twit(config.twitter);1920/* Set up connection to Airtable base */2122const base = require("airtable").base("[yourbaseid]");2324app.use(express.static("public"));2526/* Using cron-job.org to periodically visit /BOT_ENDPOINT to wake up the app and make Twitter bot tweet. */2728app.all(`/${process.env.BOT_ENDPOINT}`, function(req, res) {29 base("Tweets")30 .select({31 /* Selecting the first record in "Today" (it should only be one anyway) */3233 maxRecords: 1,34 view: "Today",35 })36 .firstPage(function(err, records) {37 if (err) {38 console.log("airtable error!", err);39 res.sendStatus(500);40 }4142 /* This will only actually run once */4344 records.forEach(function(record) {45 const URL = record.get("URL");46 const text = record.get("Tweet");4748 T.post("statuses/update", { status: text + "\n\n" + URL }, function(49 err,50 data,51 response52 ) {53 if (err) {54 console.log("error!", err);55 res.sendStatus(500);56 } else {57 res.sendStatus(200);58 }59 });60 });61 });62});6364let listener = app.listen(process.env.PORT, function() {65 console.log("Your bot is running on port " + listener.address().port);66});
I made sure to also update the .env file with:
- My Twitter API tokens
- The secret endpoint that will trigger a Tweet (keep it secret, you don’t want randoms to be able to trigger it just by visiting a URL)
- My Airtable API token
6. Time to test 🙌
I added mw first tweet to the Airtable (making sure it had the date of today), and visited my endpoint (yes, a regular browser will do!). The endpoint looks something like https://[my-glitch-project-name].glitch.com/[the-super-secret-endpoint].
I saw an OK, and my bot’s account had just tweeted it’s very first tweet!
7. One last thing
Now, I still needed to automate this though, right?
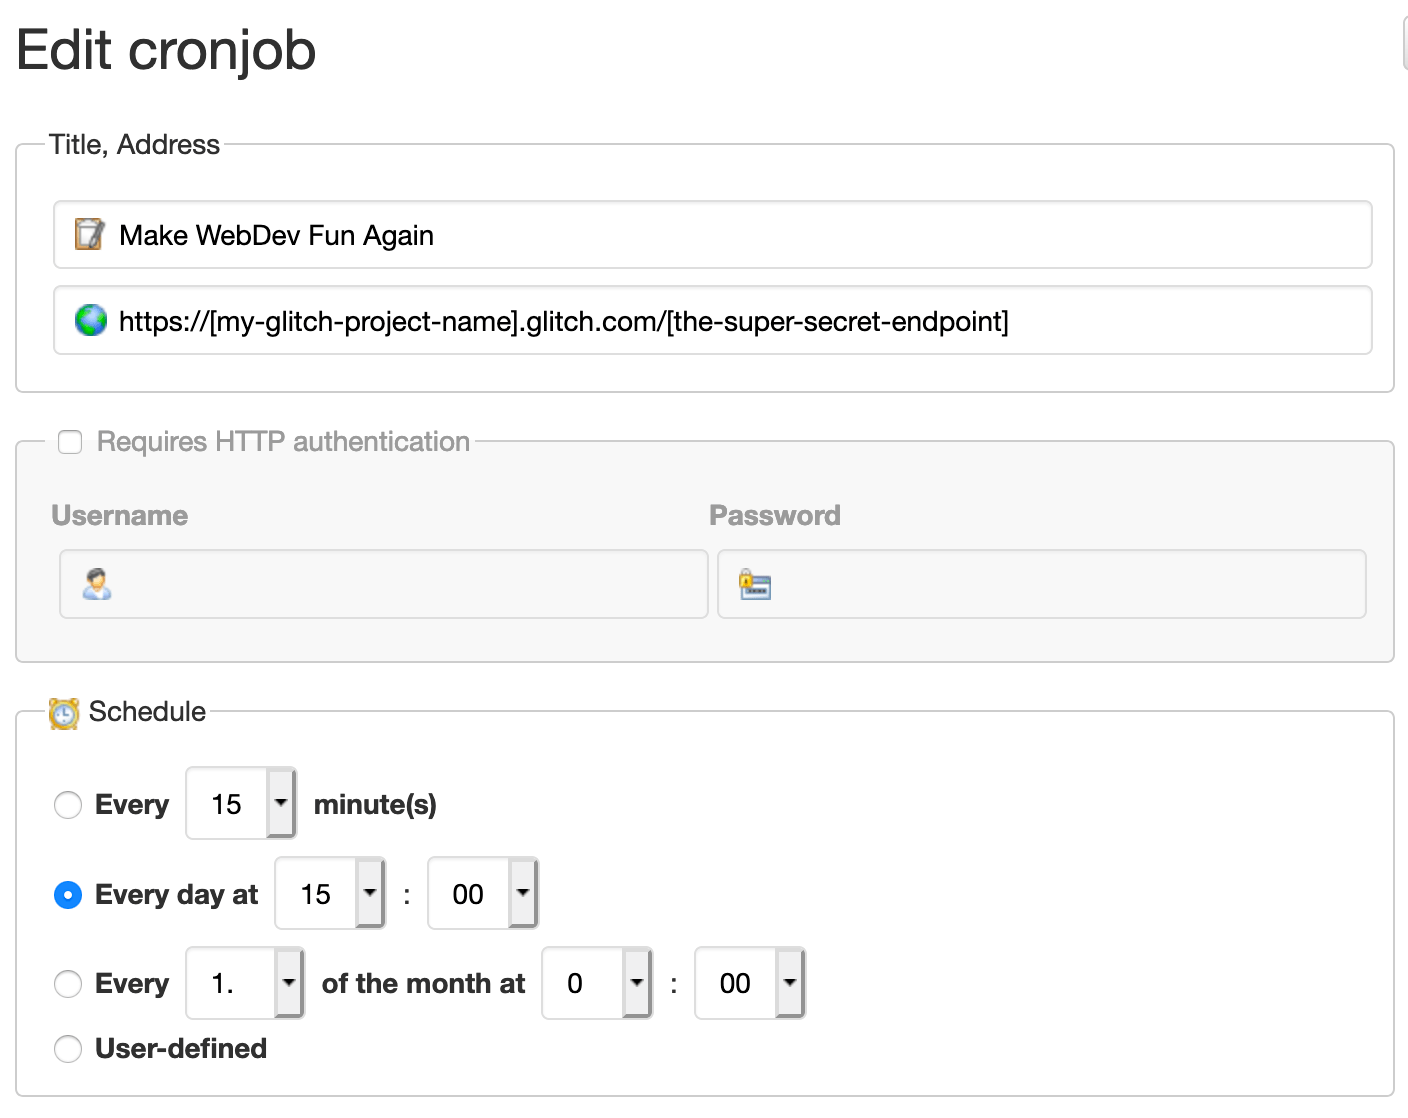
It was simple: I opened a free account on cron-job.org and activated a new cron job to run daily at 3pm (European time, which would be morning US time). The job simply calls the endpoint (see above), and the endpoint will tweet the tweet of the day according to what’s on my Airtable.

Tadaaaa 🎉
I hope that you found this interesting, and saw how making a Twitter bot is approachable and requires very little code to get started. Are you going to try? Let me know what your bot will tweet about!
So, follow 👉 @_andfun and let’s be friends on Twitter (@mjsarfatti, DMs are open) and on dev.to.
If you’d like to be notified of the next article, you can subscribe to my email list 👇
No spam ever, cancel anytime, and never more than one email per week (most probably fewer).


